Call us 24/7+254 700 031 732

Clean Windshield Washer Tubes and Jets Inspection

The tubes that make up your windshield washer system are typically several feet long
and are connected directly to your windshield washer reservoir. These tubes are exposed
to all the elements that come from the open road and over time, these tubes will begin
to get clogged and dirty..
The jets are plastic nozzles that are located right at or near the middle of your hood.
These nozzles must spray the windshield washing solution at varying levels of your driving
speed. So cleaning these nozzles periodically is absolutely critical for the system to work.
Clean windshield washer tubes and jets allow you to quickly remove mud and other
impediments that would normally get stuck on your windshield. Some of the symptoms
that may make you think that the windshield washer tubes and jets are dirty may actually
be due to the other components of your windshield washer system. These can be
cleaned out as well if needed.

Window Motor Regulator Replacement

The window regulator typically has over a dozen components that help it move up or down in a very specific fashion throughout the entire raising or lowering of your windows. These components all work together in two unique assemblies: the scissor style window regulator and the cable operated window regulator. There are scissor-style window regulators that operate like a giant pair of scissors inside your door. They’re usually almost flat when your window is all the way down and in a near perfect X when the window is all the way up. You can look at a scissor style regulator as having several thick pieces of steel that keep the window in place. It’s sturdy, but requires a strong motor that often wears out before everything else. Cable-operated window regulators use a near vertical cable to help the window get into the right position. It’s a more compact design that puts less stress on the motor. But it is also more susceptible towards breaking due to the increased stress that the pulley and cable must harness to raise and lower your window. In most cases, a cable operated window regulator is composed of one thick piece of metal with a pulley and wire attached to it — along with a more compact motor. The electric motor is designed to withstand a certain number of raises and lowerings of your window. While the regulator helps hold the window in place, the motor provides the force needed to make the window stay exactly where you like.


A window regulator assembly is composed of two components: a motor and a regulator. These components when replaced typically require you to deal with the removal of your door panel, clips, and in certain cases, even the removal of rivets and the specific removal of multiple related components. | A window regulator assembly is usually a complicated piece of equipment that can require specialized tools and a lot of patience — work best left to a professional mechanic.


The inside door panel is removed | The electrical connection is disconnected and motor removed | The window regulator is replaced | The window motor is reinstalled | The inside door panel is reinstalled and the window is tested


If your window is gradually beginning to slow down it’s often better to take care of it while the window can be shut. Once a window regulator stops working completely, it rarely starts working again unless you have other issues that can be identified by a mechanical inspection. You should have it inspected by a professional mechanic who can test the multiple components that provide the power needed to make the window and regulator assembly work properly.


A properly operating window motor and regulator allow you, your passengers, and your car’s interior to remain dry and safe. Sometimes a window regulator will stop working entirely without the window being fully closed. So of course, getting this service done sooner is better than waiting for an outright failure to occur. The interiors and power features of your vehicle can also get damaged due to one heavy rainfall that can happen when you least suspect it. So if you’re having issues now, keep you and your car dry by having the issues looked at.

Power Window Switch Repair

The power window switches are located inside the car, usually on each door. This switch takes input from either the driver or other passengers, and sends power to the window motor, which opens or closes the window. The common reason for the window to not move up or down is a fuse, window regulator, or window motor failure.


If the power window switch is not controlling the windows, it may not be a malfunctioning switch. Instead, it could be a problem with the window motor, fuse, or regulator.


Remove and replace the power window switch. | Inspect window motor, wiring, connectors, power source, and fuses. | Check for proper operation of windows.


The power window system is a closed system, so it will not be inspected during regular maintenance or service. As soon as you notice that one of the power window switches isn’t working, or is behaving abnormally, you should schedule an inspection. Power window switches normally have a long lifespan, but you should avoid using them excessively and unnecessarily; playing with the switch can shorten the lifespan of the system.


Power window systems allow you to roll down and roll up the windows in a modern vehicle. When you press the window buttons located on the inside of the doors (or sometimes on the center console), the switch triggers the power window motor, which rolls the windows up or down. When the power window switch malfunctions, there’s no communication between the window buttons and the power window motor, and you’ll be unable to roll up or down the window.

Spare Tire Installation

A customer surprised by a flat tire may want a mechanic to come out and replace the damaged tire with the spare tire.


Spare tires in many vehicles are intended only to be used as a temporary solution until a new tire (or set of tires) can be purchased.


Remove the tire and install spare tire. | Check and adjust the air pressure in all tires and adjust as needed.


Spare tires are a great solution when you find yourself with a flat tire, so you should always keep a spare tire in your vehicle. If you don’t feel comfortable putting the spare tire on, you should call a mechanic to do it for you. What are the common symptoms indicating you need to install a spare tire? Tire is flat Wheel or tire has damage


Cars need four tires to operate. Most vehicles come equipped with a spare tire in the trunk, just in case one of your regular tires blows or goes flat. In the event that a tire loses its pressure, you can use the spare tire as an interim tire until you get it replaced. Spare tires may be compact or donut spare tires which are smaller than regular tires, and for safety concerns shouldn’t be driven for long periods of time, but they allow you to get your car mobile again after a flat tire. A full-size spare can also be installed which can be used indefinitely until you can have your flat tire repaired or replaced, as long as the spare tire has tread remaining. Spare tires are not meant for use above 55 mph, so you should not drive your vehicle at highway speeds while it’s equipped with a spare tire, either compact or full-size. If your vehicle is equipped with wheel locks, a mechanic will need the wheel lock key to remove the flat tire and install your spare tire. Keep your wheel lock key readily accessible in your vehicle in the event of a flat tire.

Tire Rotation

Rotating the tires on a regular basis will significantly extend their lifespan. The car’s four tires wear out differently. If one tire wears out more than the others, the car will start pulling in the direction of the newer tires. For example, if you let go of the steering wheel when driving, (for a moment!), the car should continue to go in a straight line. If the tires have worn out differently, the car will not travel in a straight line. It will drift in the direction of the better tire. This is also the reason why when you buy new tires, it is best to buy them in pairs. Rotating your tires will help even out tire wear by allowing each tire to serve in as many of the vehicle’s wheel positions as possible. During the rotation, the front tires are moved straight back and the rear tires are moved diagonally to the front. This will ensure that every tire will see each corner of the car. Your mechanic should check for abnormal wear, which may be a sign of other problems:


If the tire treading is lower than 1/16th of an inch (or lower than the factory recommendation), the tires are worn out. | Rotating worn-out tires is of no use since the purpose of tire rotation is to extend the life of tires. If this is the case, the mechanic will not rotate the tires and we will not charge you for the service. | Tire rotation is not possible on all vehicles.


Inspect for tire wear and damage | Check the tread on the tires | Remove and rotate tires


Follow the manufacturer’s maintenance schedule and rotate the tires as advised. Rotating the tire once a year is a good idea. During the tire rotation service, the mechanic should also inspect the entire brake system (pads, rotors, calipers, hoses). What are the common symptoms indicating you need to rotate your tires? Uneven tire wear, car pulling to one side Cupping on the tires Tire rotation is performed as part of normal maintenance


As you accumulate miles on your vehicle, each of the four tires will wear at different speeds, and in different places. This is because front tires wear differently than rear tires, and right tires wear differently than left tires. If you allow these tires to stay in one position for too long, the wear will and tear will become so abnormal that the car will begin to drift in one direction or another. By constantly rotating the tires you allow all four tires to be subject to the same wear and tear, which keeps their lifespans relatively equal. A car with tires that are wearing evenly should drive more smoothly and in a straight line.

Turn Signal Switch Replacement

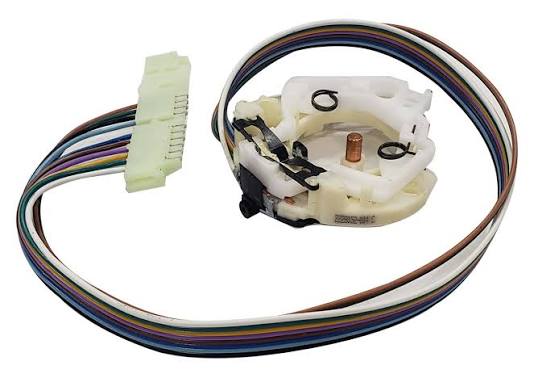
A turn signal switch replacement service addresses problems with indicators that fail to activate, stop flashing, or operate inconsistently when you use the turn signal control. The turn signal switch allows you to activate the left or right indicators to communicate your intention to turn or change lanes. When the switch becomes faulty, other road users may not receive clear warning of your movements, increasing the risk of misunderstandings in traffic. During this service, a technician checks the indicator controls, tests the turn signal circuit, and inspects the switch and its electrical connections to identify the cause of the malfunction. If the switch is defective, it is replaced with a compatible component designed for your vehicle. The technician then tests the left and right indicators, checks that the switch operates correctly, and verifies that the signals cancel automatically after a turn where the vehicle is designed to do so. Replacing a faulty turn signal switch helps restore reliable indicator operation, improves communication with other road users, and supports safer driving when turning or changing lanes.

Power Window Switch Repair

The power window switches are located inside the car, usually on each door. This switch takes input from either the driver or other passengers, and sends power to the window motor, which opens or closes the window. The common reason for the window to not move up or down is a fuse, window regulator, or window motor failure.


If the power window switch is not controlling the windows, it may not be a malfunctioning switch. Instead, it could be a problem with the window motor, fuse, or regulator.


Remove and replace the power window switch. | Inspect window motor, wiring, connectors, power source, and fuses. | Check for proper operation of windows.


The power window system is a closed system, so it will not be inspected during regular maintenance or service. As soon as you notice that one of the power window switches isn’t working, or is behaving abnormally, you should schedule an inspection. Power window switches normally have a long lifespan, but you should avoid using them excessively and unnecessarily; playing with the switch can shorten the lifespan of the system.


Power window systems allow you to roll down and roll up the windows in a modern vehicle. When you press the window buttons located on the inside of the doors (or sometimes on the center console), the switch triggers the power window motor, which rolls the windows up or down. When the power window switch malfunctions, there’s no communication between the window buttons and the power window motor, and you’ll be unable to roll up or down the window.

Power Seat Switch Repair

The power seat switches are located inside the car and are usually attached to the seat or door panel. The switch sends the power to the seat motor(s) allowing you to move the seat in various selectable directions. If the switch is malfunctioning, the seat will not move or moves only in limited directions. It is common for debris to get stuck in tracks preventing the seats from moving. Cleaning the debris may resolve the problem, but if not, we can help.


If your power seat isn’t working, it may not be a problem with the switch; it could also be a malfunctioning power seat motor, or debris in the seat tracks.


Remove the seat. | Inspect the switch & motor. | Ensure that the motor is not clogged with debris. | Inspect the wiring. | Remove and replace power seat switch if faulty. | Check operation of the seat in each direction of movement.


Keep materials such as pens, pencils, trash, and other debris from under your seat. The debris can block the seat tracks and even burn the circuit in the switch prematurely. If the seat does not move when you press the switch, have the mechanic inspect the fuse for that circuit and the switch for the seat.


When you press the power seat button on your seat or door, the power seat switch triggers a motor which then moves your seat forward or backward on a track. This control allows you to find the optimal placement for your seat, so that the gas and brake pedals are the right distance for your feet, and so that you are comfortable. When the power seat switch fails, the seats won’t move when you press the button, and you won’t be able to control the placement of your seat. Improper seat placement affects a driver’s ability to safely operate the vehicle at the correct distance from the pedals and steering wheel.

Neutral Safety Switch Replacement

The neutral safety switch keeps the vehicle from starting when in any gear position other than Park or Neutral. In some vehicles, the switch also monitors gear selection and reverse light feedback data for the vehicle’s computer. Most often mounted to the left-hand side of the transmission, the switch is equipped in vehicles with a transaxle or automatic transmission. Some vehicle neutral safety switches are attached to the shifter mechanism.


Connected to the starter solenoid, the neutral safety switch completes the starter circuit, allowing | the power from the battery to reach the starter only while the gearshift remains in Park or Neutral. | The mechanic will check the other systems in your vehicle’s ignition system, such as the starter, battery, and alternator, to make sure those parts are not causing the problem. As a vehicle ages, the neutral safety switch deteriorates.


The vehicle is raised and supported on jack stands. The transmission shift lever and cable are removed. The electrical connector is removed from the switch. | The neutral safety switch is removed from the transmission. The transmission shaft seal is checked for leaks and replaced as needed. | The new neutral safety switch is installed on to the selector shaft and secured while aligning for proper installation alignment. | The shift lever and shift cable are reinstalled. The vehicle is checked for proper neutral safety switch operation before the vehicle is lowered off the jack stands. | The vehicle is scanned for codes and proper switch indication of gear ranges and road tested for proper operation.


Replace a faulty neutral safety switch as soon as possible; otherwise, the vehicle will stop working or suffer engine damage. When the switch does not work properly, the vehicle might jump into gear upon startup. This not only causes damage to the engine itself, but poses a great physical threat to surrounding objects and people. Our expert mechanics will diagnose the neutral safety switch to see if it needs adjustment. Transmissions that exhibit excessive vibrations cause the switch to go out of alignment over time, which makes vehicle ignition more difficult. When inspecting the neutral safety switch, our expert mechanics check for dirt and grease build-up, moisture, and corrosion. They will also use a test light to confirm a connection through the switch to the starter solenoid.


Replace a faulty neutral safety switch promptly, as driving without a functional switch presents a danger to other drivers, passengers, and those around the vehicle. A faulty neutral safety switch damages the engine, as the vehicle jerks into gear upon startup. The reverse lights could stop working on some vehicles, which creates a safety hazard especially during inclement weather or nighttime.

Ignition Switch Replacement

The ignition switch, located on the steering column or in the dashboard, takes the power from the battery and directs it to all the accessories and electrical components of your car. It also transfers the power to the starter when you turn the ignition key. If the starter does not receive power from the ignition key, the car will not start. When the ignition switch goes bad, your car may not start and the accessories (lights, radio, etc.) may not work. Replacing an ignition switch can be as simple as removing a few screws to access the ignition switch, or as complicated as removing the whole steering column.


After an ignition switch is replaced, all electrical components should be checked to ensure proper operation.


Check the condition of the ignition switch. | Remove and replace the ignition switch if it is bad. | Verify operation of electrical components.


The battery feeds power to ignition switch, so it is important for the ignition system that the battery is in good condition. Don’t put too much weight on your key ring because this can damage the key and the tumbler part of the ignition switch. If there is no power inside the car (none of the electrical components are working), have the mechanic inspect the main fuses. If the fuses are good, then the mechanic should inspect the ignition switch and other electrical components.


The ignition switch serves to send power from the battery. When you turn your key to turn on your vehicle, the ignition switch takes power from the battery and sends it to the starter, which allows your vehicle to turn on. When you turn on any electrical components in your vehicle (such as your lights, radio, and air conditioning), the ignition switch draws power from the battery, and sends it to these electrical components to power them. When your ignition switch stops working, your starter and your electrical components have no way of drawing power from your battery. With a faulty ignition switch, you won’t be able to use your radio, lights, or air conditioning, and you won’t be able to turn on your vehicle. In extreme cases, a broken ignition switch won’t allow you to turn your vehicle off, even if you remove the key.

Search for products

Back to Top
Product has been added to your cart